Below is a Recipe for Heather who just had her first baby ... "Brodie". It's a Boy! Congratulations Sweetie... you sure have grown up since we first met at Listening Heart Farm Bed and Breakfast.

Heather has requested a Toffee Syrup Cookie Recipe made with left over crackers she tasted when she was a Guest at Listening Heart Farm Bed and Breakfast. Children and Adults both like this unique Recipe.  This Recipe was originally served to me by Toby, the wife of  Michael...  The Pastor of Lion of Judah Messianic Church, back in the 1980's.

Toby's Toffee Crunch Cookies
  • Enough Saltines Cracker to fill a Foil Lined Cookie Sheet *about 40
  • 1 Cup Sugar (white or brown)
  • 1/4 Cup Water
  • 2 Sticks Butter (use one stick for cruncher cookies)
  • Small Bag Chocolate Chips
Preheat Oven To 425 degrees.  Lay out the Crackers on a Foil Lined Cookie Sheet, back to back.  The Cookie Sheet will need to have a rim. A Jelly Roll Pan will work too. Bring Sugar, Water and Butter to a boil and stirring continually, boil about 5 minutes.  Slowly pour hot syrup mixture over Crackers which are laid out on the Foil lined Cookie Sheet, covering them evenly.  Bake 5 Minutes. Remove from Oven ... immediately sprinkle Chocolate Chips on top, smearing them over the Cookies as they melt with a Spatula or the back of a spoon.  Refrigerate or freeze till hard, about 15 minutes. When cold, break them into pieces like Peanut Brittle. If the Chocolate does not melt all of the way, you can put the tray back in Oven for a minute or so to help in this process.

Options, sprinkle crushed nuts over melted chocolate, I prefer Hazelnuts. You can vary the Recipe by using the left over Crackers of your choice; Graham Crackers will make this cookie even sweeter. Personally I find it sweet enough without the Graham Cracker ... but would suggest if you use Graham Crackers, that you try making them similar to Smores by drizzling melted Marshmallow Creme on top.  This is also a good way to use up Stale Crackers as once they are baked, the heat and moisture freshens them.

~~ The Resource Links added here are predominately for the benefit of those who are new or adventurous cooks ... some of these items can be found in your local Grocer, Discount or WalMart type of store for those who want to be frugal. ~~

Next:  Recipes for those looking to fill non traditional Easter Baskets.

Enjoy and Happy Baking!
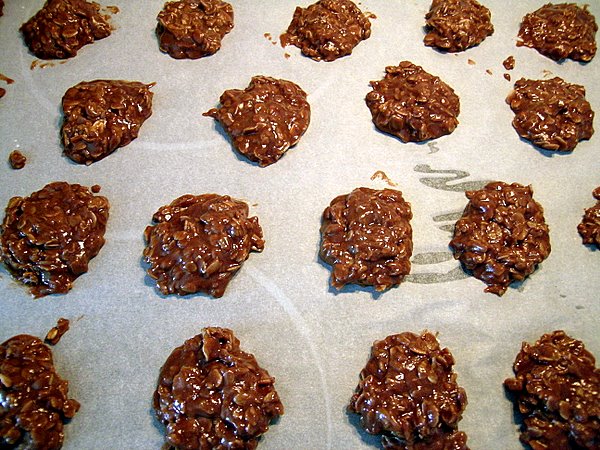
After reading my 'Mississippi Mud' Recipe, a long time friend Brenda asked for one of My Favorite 'No Bake Cookie' Recipe. Can't remember where this Recipe came from:

No Bake Fudge Cookies
  • 1 stick Butter
  • 1/2 Cup Peanut Butter
  • 2 1/2 Cup Sugar
  • 1/2 Cup Cocoa
  • 1 Cup Milk
  • 1 Tsp Vanilla
  • 2 1/2 Cups Oatmeal
  • 2/3 Cups Coconut
Melt together the first two ingredients before stirring in sugar and cocoa. Mix them in well before adding Milk.  Simmer over low heat for about 10 minutes... until the mixture comes to a hard ball stage. Add Vanilla after this and mix well.

Dump Oatmeal and Coconut on top of mixture and stir in well... simmering about 2 more minutes.  Do not allow to scorch.

Dollip onto a cookie sheet the sizes you desire. *bite size or cookie size.  Allow them to harden before storing in a sealed container.  Do not allow to cool in pan... will harden quickly.  

Makes a great gift of a dozen or more cookies. 

Enjoy and Happy Cooking!
When I was an Inn Keeper and Chef at Listening Heart Farm Bed and Breakfast... and Guests asked me to bake them something special; 'Death by Chocolate' was usually in their descriptions of what they wanted. Below is a Recipe given to me by my long time friend Randue back in the 1980's that always fit the bill. I am posting it at the request of a newer friend, Gordon. He says when he's depressed he uses Chocolate as a pick me up ... Gordon is battling with Prostate Cancer... and wants to thank anyone in advance who would say a prayer in his behalf.  If you would include Urba, Walter, Barb, Sherry and Laurie ... all those in such a battle, I know they are hoping to be cancer survivors too! Father we ask and thank You for the gift of a Miracle according to Your Will and Timing.


Randues' Mississippi Mud Cake Recipe
  • 1 Box Pillsbury Plus Devils Food Cake
  • 8 Ounce Cream Cheese
  • 1 Cup Sugar
  • 1 Egg
  • 1 Tsp Vanilla
  • 12 Ounce Bag Chocolate Chips

Mix Cake according to directions on box. Blend the rest of the ingredients together.  Fold in Cream Cheese Mixture. Bake 30-40 Minutes til top firm.  Cool on a cooling rack before Frosting.

Randues' Mississippi Mud Frosting
  • 2 Packages Dream Whip
  • 1 1/2 Cup Milk 
  • 1 Pack Fudge Instant Pudding 
Mix together well.

Option: 1 cup of chopped Walnuts can be added to cake or frosting or both.

ADDED TREAT: Here is an excerpt of a Blog with another Mississippi Mud Cake Recipe, that one is made from Scratch, just discovered it while looking for an Image to post. If anyone tries it or has other's to recommend, do leave a comment.

A Muddy Cake Story.

Today, July 13th

I discovered that today is the anniversary in 1832 of the source of the Mississippi River, for which we must all be very grateful, as otherwise we might not have Mississippi Mud Cake. Thank you Mr. Henry Rowe Schoolcraft.

Recipes are never actually invented, they evolve over time. The Mud Cake is a fairly new species which seems to have sprung off the American parental tree in the early 1970’s, along with its cousin, The Mud Pie. Its ancestors are the Brownie (a mud cake is a more sensible sized brownie, that is all) and Fudge, but there must be a few rogue genes in there too, as the early 1970’s recipes for Mud Cake also contain marshmallow.

This particular type of Mud Cake either never migrated to region Australia, or when it did, the marshmallow was removed, for all of the Aussie Mud Cakes I have met are entirely marshmallow-free (which makes them purer and better, to my mind, but you may disagree.

Every family has its black sheep, and at some time after the birth of the Mud Cake there sprang up something called Dirt Cake. I have never come across a live specimen, but in the interests of culinary history, sought out a recipe for you. It has an ingredient called ‘chocolate pudding mix’ in it, as well as broken up commercial biscuits (Oreos, which I believe are quite revered in their homeland), and I confess I could go no further. I am not sure what ‘chocolate pudding mix’ is, but I am pretty sure I wouldn’t like it, and I am very sure it has no place in a cake. Call me a purist. Call me a snob. Just don’t call me to the table and make me eat chocolate pudding made from a mix.

I would, however, be more than willing to sample this recipe....."

For the Recipe please check out this link worth mentioning The Old Foodie 

Enjoy ... Happy Baking!

UPDATE: Since creating this Blog I have been asked to post my Favorite No Bake Cookie Recipe by a Friend who tasted it while visiting our home. Plan to do so in about 3-4 blogs from now... as to do so sooner will interrupt the flow of its spiritual continuity. Thanks for your patience my Friend......
Rather than write an Article today on Seed Starting, I decided to recommend this Blog from a Follower who  has been starting seeds in her Greenhouse for many years: http://riosambagardening.blogspot.com/

Although I have been starting seeds for years... I start my seeds in Windows in our home, custom built with that in mind... for those of you who have Sun Rooms, don't be afraid to use them as a Grow Room too.  I may do an article on small scale seed starting with Frugal Tips in another Blog especially if there are questions that need to be answered at Readers Requests ... in the meantime there are lots of tips here to 'get you started' *wink I suggest for the small scale seed starter you begin with Tomatoes, Peppers and Melons... as they take a while before they mature and by starting them indoors early, you will have an earlier and thus larger harvest.

Below is an Excerpt from Riosamba's  Blog  Joy of Gardening ... do visit it and check out her other Articles  and Fabulous Photos.  Here are some of her other Blogs which are links worth mentioning: My Favorite Recipes  Riosamba's Zazzle Store  Book Worm Book Reviews

SEED STARTING

Growing your own seeds is fun and easy.   I have been sowing my seeds in the greenhouse for many years.  Timing is critical for success.  Soon I will be sowing peas in a reusable polystyrene trays with  individualized pyramid shaped cells which virtually  eliminate transplant shock.   I have been using this type of tray for several years.  You may find the trays herehttp://www.groworganic.com/ , those mushroom containers, milk carton, tofu containers, yogurt/pudding cups,  they are all perfect for seeds starting.  First you need to clean the containers with a solution of 9 parts of water and 1 part of  chlorine bleach, followed by thorough rinse with water.  The picture on the left is the polystyrene tray where I sow garden pea seeds.


Need to remember too, peppers, eggplants, tomatoes are slow germinating.  You want this to start early, especially when summer is short in your area.  I sowed tomato seeds in March, peppers a little bit early in January.   The peppers have germinated well,  I spray them with chamomile tea to prevent damping off a fungus type disease.  Broccoli and cauliflower sowed in the greenhouse as well as herb seeds later this month.  The rest such as summer squash, pumpkins, lettuce, collards, kales,  carrots all directly sowed in the garden.

Use sterile soiless seed starting mixes.  Either you make them yourself or store bought. Do not use garden soil as this contains weed seed, harbor diseases and tend to be muddy, hard and reducing germination and root growth.  Seed-starting mix containing sphagnum, vermiculite, limestone, and gypsum.

Read the seed packet for intructions and carefully determine when you have to start sowing, and  tinning the seedlings.  Germination can vary from few days to several weeks.  This depending on what variety of seeds you are sowing.  With my experience, you need to sow the seed thinly, over crowding will produce weak seedlings.  Into medium barely cover seed with starting soil and gently press into mixture.

Label and date each variety as you work.  This is important, if not you will forget which variety of seed you sowed.  Water lightly with a spray bottle.  Keep the soil moist as this important for gemination.  Then cover flats with clear plastic and keep out of direct sunlight.

Remember to remove cover for an hour or two everyday to provide air circulation.  Most seeds germinate well between 70-75F.  I used heating cable that is burried under soil and the containers or flats I rest on it.  It worked well as long as you keep the heating cable on all the time.  Don't forget to remove covers once 50 to 70% germinated.  Remove flats or containers from heat to prevent seedlings grow thin and leggy.

Place seedlings in a bright, sunny window or if you are lucky a greenhouse.  If you do not have adequate light use artificial light 12 to 14 hours each day.  I used plant fluorescent light in the green house after dusk.  I keep checking the seedlings for fungus diasese.  This is their crucial time.  Seedlings require little fertilizer.  As they mature apply your favorite fertilizer


It is so much easier to thin seedling when they are larger. generaly 1-2" tall.  Thinning is necessary to prevent crowding.

Before transplanting in the garden, acclimate the seedlings outdoors 1to 2 weeks,  this is called hardening off.  Select spot out of direct sunlight and away from wind.  If nights are still cold bring them inside.  After several days, provide 3 to 4 hours direct morning or afternoon sun.  Gradually increase daily exposure to sunlight.

Move young plants to garden for transplating preferably on cloudy day or late afternoon to minimize transplanting shock.   Set out hardy plants after heavy frost has passed.  Set out sensitive plants once night time above 58F.  I covered sensitive plants with a sheet when the forcast called for low temperature.

Happy Gardening !

My good Friend Sherry gave this Recipe to us... with a cup of Sour Cream as a thank you gift. The Sour Cream is the 'secret' ingredient which makes it extra moist.  It's her Mother Marion's Recipe. 
Thanks again Sherry.


I not only made it as a Loaf, but I also added Chocolate Chips and a little extra Banana and made this Recipe into Muffins. If you decide to use extra Banana, nuts and Chocolate Chips in your Banana Bread, you will need to use two small Loaf Pans or one extra large Loaf Pan or it will over flow when it Bakes.


Banana Bread or Muffins
  • 1/2 cup Butter
  • 1 1/4 cup Sugar
  • 1 1/2 tsp Vanilla
  • 1 cup Sour Cream
  • 1 cup mashed ripe Bananas
  • 2 Eggs
  • 2 cups Flour
  • 1 tsp Baking Powder
  • 1 tsp Baking Soda
  • 1/2 tsp Salt
  • 1/2 c chopped Nuts or more to taste (optional)
  • small bag Chocolate Chips or more to taste (optional)
Cream together Butter and Sugar in a large Mixing Bowl, add Eggs and beat well.  
Mix in Vanilla and Bananas.

*Sift together Flour, Baking Powder, Baking Soda and Salt.
Add Dry Ingredients a little at a time, alternating it with the Sour Cream, mix till blended well.
Fold in Nuts and/or Chocolate Chips

Pour into greased Loaf Pan, Bake 350 degrees for one hour or until tooth pick comes out clean.

OR... fill greased Muffin Tins 3/4 full  (if using paper Baking Cups there is no need to grease Muffin Tins). 
Makes 2 dozen.
Bake 350 degrees 12-15 minutes or until tooth pick comes out dry.

*If you do not have a Flour Sifter, you can substitute a Wire Mesh Strainer... shake it over the mixing Bowl and press any left over crumbles with the back of a spoon.  Sifting first causes flour recipes to be of a lighter texture and taste, but it is not necessary.     
TIP:  Ripe Banana's can be frozen in their skin or peeled first and placed in a baggie.  When they defrost they will be mushy, perfect for use in baking, puddings and smoothies.

~~ The Resource Links added here are predominately for the benefit of those who are new or adventurous cooks ... some of these items can be found in your local Grocer, Discount or WalMart type of store for those who want to be frugal. ~~

Enjoy and Happy Baking!
question.jpg question image by hwcprayerroom 
I have been told there are those who have Specific Questions who are currently being referred to Living A Simplified Life ... one in particular will have Beginner Gardening Questions.  With that in mind, I would like to give Readers the opportunity to ask Questions on their Topic of Choice and to offer Insights and Solutions with me in the Comments Section ... and if need be later, in a Forum Format. 

If an immediate answer is not available through us and I know of no Referral, I will do Research on Topics which are relevant to the intent of this Blog at my leisure and I will eventually Blog what I discovered along the way.

As a wise and loving man once said, 'The only stupid questions are those which are not asked.'  So ... please... don't be shy, ask away ... surely one of us will have an answer!
question.jpg question picture by Hao_t_leAnonymous Questions can be sent to www.Networkers@msn.com