

 Posts
Posts


If you are considering having a Garden this year, due to the increased Cost of Living or a desire to be more self-sufficient, you may find this Post beneficial. This is a long post, so eventually I will break it down into bite size pieces, for those looking for specific Topics. In the meantime, for future reference I offer several links for your convenience. Some I have personally used as my skills were honed over the years, others I have added so the Reader can better understand what I am referring to.
As a whole, I find Gardening to be therapeutic and a sacred
time of prayer where I commune with our Heavenly Father and He communes with
me as our
Master Gardener. For me this is likened to moments of tending the Garden of
Paradise, enjoying the process of creativity and nature about us while
conscience of our Creator enjoying these moments with me.
Each season is unique and brings with it its own set of lessons, both spiritual and natural. I will be sharing some of them on this Blog by way of Practical Tips as well as examples of how the Holy Spirit taught me what it means to us to 'walk in the Spirit' as He Teaches and Guides me according to Father's will for my life, day by day, season to season.
For example, one year I sensed Father telling me to allow
some of our Beds to lie fallow and
not to grow
to preserve or eat fresh that year, (I Can, Dehydrate, Freeze Store
Produce, as well as share) At the end of the Season I could see why and
was delighted I listened. My efforts would have been in vain due to the
combination of what at that time was a rare Weather Pattern and a broken wrist
I carelessly brought on myself. At the end of the season, as usual, I planned on winterizing
the Garden. So, before the injury I sought the mind of our Lord
as to whether lying
fallow included excluding those chores as well.

At the beginning of each Veggie and Fruit Season, previous winterizing enables me to pull back a layer of straw mulch and put in a plant and top dress it with compost; refreshing the straw as needed. Mulch not only keeps in moisture and enriches the soil as it decomposes, but helps keep the weeds down making spring clean-up easier.

The first time I was inspired to do this Hubby tilled and
raked out the weeds. I put down a layer of recycled cardboard and thick newspapers
near where the plants were to be and in the walkways, before putting down a
thick layer of straw. After that, at the end of the season we would add extra
straw once we cleared the bed of non-beneficial debris and weeds, for the
winter. Cardboard and Newspaper can be found at Recycling Centers.
Bulk Straw is found at a reasonable cost via Craigslist or through word of mouth.
You can also find it at Lowes or
your local Farmer's Cooperative (Bulletin Board) for a little bit
more. Make sure it's straw and not Hay, as Hay has seeds. Decomposing Straw
is fine too, and some Farmers will give it away free.
If possible, I try to stay in the walkways and thus not pack
down the soil. Now that our Beds are established, I have learned to take
advantage of Companion
Planting and rotate our crops to
avoid diseases and destructive insects as well as depletion of the soil.

Creating Beds in this way helps immensely ... I
remember the first year I was inspired to mulch with straw, our area had its
first serious drought. While Neighbors lost their plantings, we had food.
The drought was so severe the State trucked in water. The local
Restaurants had to have Portable-Potty’s, could only use paper and plastic
Products, and bottled water. Following our intuition, what we discern as
the Holy Spirit's leading, even if we do not always understand why we are being
moved in a certain direction had definitely worked for us. I encourage others
to try to see if it works for them too, if you have not already done so.
It saddened me to leave some of the potatoes in
the ground, and to leave our final harvest of Green Beans to dry on the
vine one year, because we had more harvest than I could handle and no one
available to help us harvest or preserve it. I assumed that because the frost
hit them they would not germinate, (I learn a lot from trial and error). To my
amazement, the Green Beans self-sowed after I pulled the vines down and by way
of composting, put straw on top of them as I readied the bed! Joy…
Green Beans need warm soil to germinate, so they can be planted later; they
only take 60 days to harvest.
To our surprise as I inspected the Beds the following spring, we discovered some crops (potatoes, beets, and missed carrots and parsnip) overwintered. I decided to let the Carrot and Beets go to seed and let the Potatoes grow, keeping an eye out for late Blight as they do. Since then, I have discovered Potatoes produce seed. With that in mind, I decided to do some research and find out what crops actually will self-sow and or come back the next year.
To our surprise as I inspected the Beds the following spring, we discovered some crops (potatoes, beets, and missed carrots and parsnip) overwintered. I decided to let the Carrot and Beets go to seed and let the Potatoes grow, keeping an eye out for late Blight as they do. Since then, I have discovered Potatoes produce seed. With that in mind, I decided to do some research and find out what crops actually will self-sow and or come back the next year.
Over the years I have added on the delightful chore of seed saving (flowers
too). I knew from research some
flowers self-sow and have taken advantage of that knowledge when I
have made my choices of what
to plant by way of Companion Planting and for the sake of bringing in
beneficial insects and pollinators. As I cleaned up the Beds during spring, I
discovered other flowers that self-sowed as well. What a thrill, no need
to save so many seeds at the end of the season! Works for me!!! Not
only will I save time but storage space, (we live in a small cottage on an acre
in the country). In addition, there will be less work to do next season if
properly managed. However, I do suggest if you have the space, that you save
seeds, for
some remain viable for several years.

One spring, due to another unseasonable Weather Pattern and
my Hubby extending our main Fruit and Vegetable Bed for us, I was late getting
in most of our starter plants. This was not a problem, as they kept well in the
small Greenhouse Hubby build us the previous fall. Had they all been planted, some could have
died in the unusually late frost that took place that year.
That gave me the opportunity to try out what I learned about
emergency Frost
Proofing our Garden. I covered two tomato plants
with tall wooden fruit bushel baskets. I temporarily put extra
straw over the sprouted Green Beans and Lettuce. I covered some flowerpots with
Pillow Cases; clear large Trash bags work equally well.

If you want to extend
the Season, early or late, used lightweight sheets or sheer curtains will
do nicely, as will turned over large vases or plastic milk jugs, clear totes or buckets
for Cloches. I found the sheer curtains draped over bush beans or greens will keep the Deer from consuming them. If you are concerned about the look, dye them green. Old Windows can be made into Cold Frames. There is a lot that can be
grown throughout the winter. Having chosen to live a frugal life, we do not mind if the Garden does not look perfect.
The cool weather and root crops were fine … most of our
Fruit Trees had already bloomed and had fruit growing. The frost did not affect
them, as it had in previous years. For that, we were grateful. Any concerns we
had about getting our plants in late lifted. Planting later than recommended in
our zone also seems to bring in less of the harmful insects; it seems to be
they have already found other food gardens to eat.

In the meantime, I had plenty to do by way of transplanting
and working on the other Beds while Hubby was busy with other gardening chores.
I learned a longtime ago it is usually necessary to transplant or pot up
something and find while I enjoy our permanent Beds, I also like creating new
ones or redesigning old ones with those that need to be divided up or
transplanted, that I do not give away. I can see though, as I age, in
days to come I will need to forego that pleasure. I have too many Beds to
maintain well now and the price of that is, my Beds are not perfect in
appearance (never have been actually, but I like the Cottage Garden look) and are not always as successful as I
intended. However, that is not a problem
for me ... I've learned to be content and do the best I can and enjoy the
moment, letting go of expectations; as ultimately I am not the one in control
of the outcome, too many variables that take place has proven that to be
the case on numerous occasions over the years.
In my early days, I was pleased to find some Medicinal
Herbs and added them alongside a larger variety of Culinary Herbs.
Several of them were self-sowing or spread, which kept me from having to reseed them or fill in the spaces the
next season. I enjoy preserving these as well, using and sharing them all
year.

 with Home Cooking, here is another suggestion:
 *
* or
or  Chocolate works just as well
 *or regular Jelly Beans for those on a Budget
 and microwave 2 to 4 minutes, until barely melted, being careful not to over cook. OR melt on top of a double boiler. Stir to make sure chips are completed melted.
  , spreading it out to about 1/4 inch thickness. Using your favorite flavors, while still hot, sprinkle about 15 tiny beans on each, pressing beans lightly into the Chocolate. Allow to cool completely. Makes about 8 Pieces.
 and leaving them until they harden. If this works, will try it within
  ... using melted Chocolate Bars which I will premix with cracked Nuts, Peppermint or other delectable Candies; and simply pour the entire mixture into the cookie cutters to harden, may leave them in the Cookie Cutter and give them away as Gifts. OR I am also considering pouring the entire mixture onto a wax paper lined rimmed Cookie Sheet or
  , and then using a heated Metal Cookie Cutter to cut out the shapes .... naturally all scraps and broken pieces can be eaten as well.
 , you may want to consider this easy Recipe:
 . Refrigerate until firm. This Peanut Butter Fudge melts in our mouth.
 *
* 
 or with a
  stirring frequently. If using a diffuser, after the chocolate is melted, you must keep it melted by placing the sauce pot in hot water. Do not allow hot water to overflow into the pot!
 , dip pretzels into melted chocolate then place on wax paper to dry. Sprinkle with additional nuts or fun topping of choice if desired. If in a hurry, place wax paper on a platter and place in freezer or refrigerator.

 . A
. A  will work too. Bring Sugar, Water and Butter to a boil and stirring continually, boil about 5 minutes. Slowly pour hot syrup mixture over Crackers which are laid out on the Foil lined Cookie Sheet, covering them evenly. Bake 5 Minutes. Remove from Oven ... immediately sprinkle Chocolate Chips on top, smearing them over the Cookies as they melt with a
  or the back of a spoon. Refrigerate or freeze till hard, about 15 minutes. When cold, break them into pieces like
  . If the Chocolate does not melt all of the way, you can put the tray back in Oven for a minute or so to help in this process.
 . You can vary the Recipe by using the left over Crackers of your choice; Graham Crackers will make this cookie even sweeter. Personally I find it sweet enough without the Graham Cracker ... but would suggest if you use Graham Crackers, that you try making them similar to Smores by drizzling melted Marshmallow Creme on top. This is also a good way to use up Stale Crackers as once they are baked, the heat and moisture freshens them.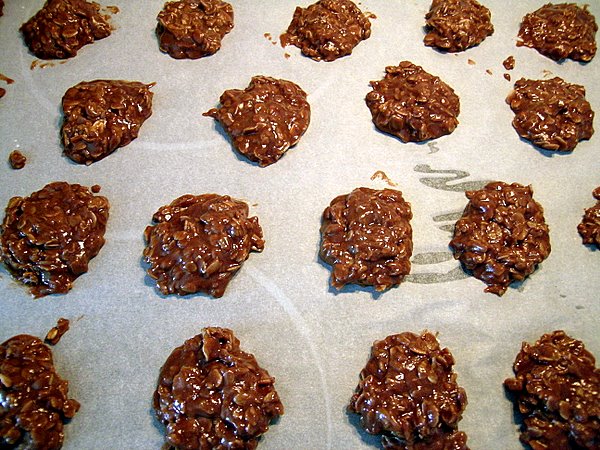

 with me. We laughed together as she tickled the various fabrics used on this Board Book. I thought this was a very creative way to play while reading. Ethan Long has other books such as 'Stop Kissing Me' and 'Duck's Not Afraid of the Dark', as well.
 Not only did she like reading this Board Book with me, she carried it around and read it over and over alone. The Ladybugs used in this book are made of hard plastic and the pictures are very colorful. The Book begins with 10 little lady bugs inside of a hole and as the child turns the page, they count down until there is only one ladybug in a hole. She liked touching them and trying to pick them up.
 is an excellent beginners book on teaching your Toddler about 'feelings'. It has bright and colorful pictures which illustrates with body language feelings, such as happy and sad, loving and scared and more.... it's a great book to help a little one identify feelings. I checked this one out of the Library with the intention of reading it to my Grand Daughter over

 and
and  are Music DVD's... they have a song children happily sing about going potty while there are head shots of them waiting on their Potty Seat for the 'poo poo' which, the Mommy who narrates the animated aspects of this story explains takes a little longer. Once accomplished... the animated Mommy and Daddy empty the potty seat and along with their daughter tell the poo poo and wee wee bye bye as it is flushed away. Having raised 3 children of my own. I remember reading in advance, this aspect of Potty Training could cause fear and trauma if not handled properly, so I was pleased to see the gracious way this was dealt with in this informative Video which helps to make going potty seem like something fun to do. I am presuming the Father is the main Voice in the Once Upon a Potty Video for him.


